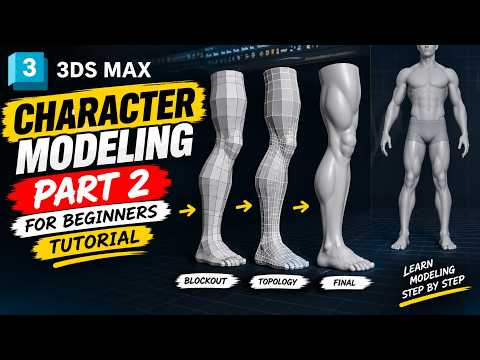
Welcome back to Part 2 of our character modeling tutorial series! In this guide, we shift our focus to one of the most crucial elements of organic human anatomy: the lower body. Learning how to build realistic character legs in 3ds Max is an essential skill for any aspiring 3D artist, game developer, or animator.
Whether you are just getting started or looking to improve your digital sculpting workflow, this beginner-friendly lesson breaks down the process step-by-step—taking you from basic geometric shapes to clean, production-ready 3D topology.
Step 1: Blocking Out the Basic Shapes
Every great 3D model begins with a strong foundation. Instead of jumping straight into complex details, start by blocking out the main proportions of the leg using simple primitive shapes, such as a cylinder.
Align your base shape with anatomical reference images from both the front and side viewports. Focus on capturing the natural silhouette: the slight outward curve of the thigh, the constriction at the knee, and the tapering down through the calf to the ankle. Getting these primary proportions right early on saves time later.
Step 2: Defining Muscle Structure and Topology
Once your base volume is set, it’s time to leverage the powerful polygon modeling tools inside 3ds Max to refine the geometry. Insert strategic edge loops around key anatomical landmarks—specifically the knee joint, quad muscles, and calves.
Proper 3D topology is critical for organic models, especially if your character will be rigged and animated. Aim for clean, quad-based polygon flow that follows the natural contours of the leg muscles. Adding adequate edge density around the knee ensures smooth bending and prevents awkward mesh stretching during movement.
Step 3: Optimization and Polish
The final phase involves smoothing out your mesh and ensuring optimal polygon distribution. Check your model for undesirable shading artifacts, stretched polygons, or unwanted n-gons (polygons with more than four sides). Inspect the leg from every angle to ensure the transitions between the thigh, knee, and lower leg feel continuous and natural.
Next Steps for Your 3D Workflow
Mastering leg geometry is a major milestone toward elevating your overall character modeling skills in 3ds Max. By starting with simple blocking techniques and prioritizing clean edge flow, you ensure your models look visually stunning and perform seamlessly in production pipelines. Stay tuned for Part 3, where we continue building the rest of the character!


