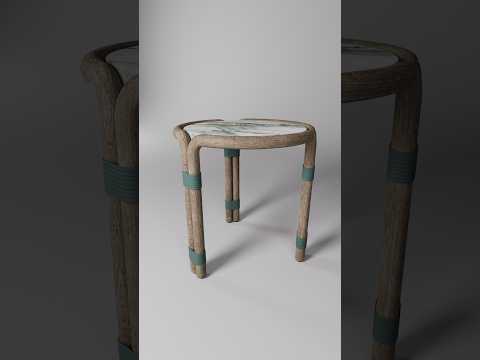
In the world of 3D visualization, creating realistic interior assets is an essential skill. Whether you are rendering a modern living room or a sleek office space, mastering furniture design within 3ds Max architecture workflows can elevate the visual quality of your renders significantly. In this guide, we’ll walk you through the step-by-step process of modeling a stylish side table in Autodesk 3ds Max.
Setting Up Your Scene for Furniture Modeling
Before diving into geometry creation, proper scene setup is crucial. Open 3ds Max and ensure your units are set correctly (typically millimeters or inches, depending on your project standards). Having accurate, real-world dimensions ensures your furniture seamlessly fits into larger 3ds Max architecture interior environments.
Start by importing reference images or rough dimensions of the side table you want to create. Position these reference planes in the front and side viewports to guide your proportions throughout the modeling process.
Step-by-Step: Modeling the Side Table
- Create the Base Structure: Begin with a basic primitive, such as a Cylinder for a round tabletop or a Box for a rectangular frame.
- Convert to Editable Poly: Right-click the object and convert it to an Editable Poly. This unlocks essential sub-object modes (Vertices, Edges, Polygons) needed for detailed manipulation.
- Form the Table Legs: Model the legs using slender cylinders or splines with sweep modifiers. Use tools like Swift Loop and Extrude to craft joint details or tapered ends. If the table features symmetrical legs, utilize the Symmetry Modifier to streamline your workflow.
- Refine Details with Chamfering: Sharp 90-degree edges rarely exist in real life. Apply a Chamfer Modifier to the edges of the tabletop and legs. This allows light to catch the highlights softly, making your 3D model look photorealistic.
Texturing and Rendering with V-Ray and Corona
Once your geometry is finalized, bringing your model to life requires realistic materials and lighting. In professional 3ds Max architecture projects, rendering engines like V-Ray and Corona Renderer are the gold standards.
Apply high-resolution PBR (Physically Based Rendering) wood, marble, or metal textures to your side table, ensuring proper UVW Mapping. Place your finished asset next to a sofa or bed in your interior scene, set up soft lighting, and hit render to see your side table shine.
Final Thoughts
Modeling custom furniture like side tables is a fundamental skill for any 3D artist and arch-viz designer. By combining precise poly-modeling techniques with powerful rendering tools, you can craft stunning assets that bring warmth and realism to any architectural project. Practice these steps, experiment with different designs, and happy modeling!


