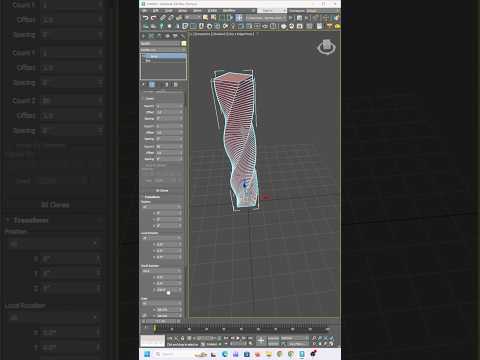
In the world of 3D design, efficiency is just as important as creativity. If you have ever found yourself manually copying and placing dozens of objects—like the steps of a spiral staircase or the pillars of a grand hall—you know how time-consuming it can be. Mastering the Array command is one of the most efficient ways to speed up your 3ds Max modeling workflow and ensure mathematical precision in your scenes.
Why Use the Array Command?
The Array tool is a powerhouse that allows you to create multiple copies of an object simultaneously while controlling their position, rotation, and scale across three dimensions. Whether you are creating architectural details or complex mechanical parts, this tool is indispensable for high-quality 3ds Max modeling. Instead of "eyeballing" the distance between objects, the Array command lets you input exact values, resulting in a perfectly symmetrical and professional look.
Getting Started with the Array Dialog
To access this tool, simply select your object and navigate to the Tools menu, then select Array. A comprehensive dialog box will appear, offering two main ways to distribute your objects: 1. Incremental: This allows you to set the specific distance or rotation angle between each individual clone. 2. Totals: This allows you to set the overall distance or rotation for the entire group of objects, and 3ds Max calculates the spacing for you.
Linear, Radial, and 3D Arrays
One of the most versatile features of the Array tool is its ability to work in 1D, 2D, and 3D. * 1D Arrays: Perfect for simple rows, such as a picket fence or a series of windows. * 2D Arrays: Ideal for creating grids, like floor tiles or office cubicle layouts. * 3D Arrays: Used for complex structures like multi-story parking garages or stacked honeycomb patterns.
If you want to create a circular pattern, such as a clock face or a Ferris wheel, you can adjust the rotation settings and the object's pivot point to create a perfect radial array.
Pro-Tip: Use "Instance" for Better Performance
When using the Array tool, you will have the option to create Copies, Instances, or References. For most 3ds Max modeling projects, choosing Instance is the smartest move. This ensures that if you change the geometry of one object later, all other objects in the array will update automatically. Furthermore, instances use significantly less memory, keeping your viewport smooth and your render times fast.
Conclusion
The Array command might seem intimidating at first glance due to its many settings, but once you master it, you will wonder how you ever worked without it. Start experimenting with different offsets and dimensions today to take your 3D environments to the next level!


