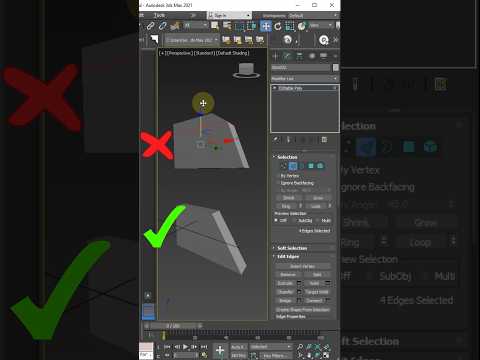
When working on complex 3D models, maintaining clean topology is crucial. Have you ever tried to adjust an edge loop in Autodesk 3ds Max, only to watch your smooth surfaces warp and distort out of shape? This common frustration can derail your modeling workflow and ruin your mesh. Fortunately, there is a simple, built-in technique to slide edges seamlessly along an object's existing surface geometry.
In this practical 3ds Max tutorial, we will walk you through the exact steps to move edges without causing mesh distortion, helping you maintain perfect control over your 3D models.
Why Geometry Distorts When Moving Edges
By default, moving sub-objects like vertices or edges in 3ds Max shifts them freely in world space or object space. If your model features curved or organic surfaces, dragging an edge straight across X, Y, or Z axes will break the curve, pulling the surface inward or pushing it outward.
To prevent this, you need to constrain the movement of your selection to the surrounding faces—a technique essential for both hard-surface and organic modeling.
Step-by-Step: Moving Edges Without Distortion
Achieving smooth edge transformation takes only a few clicks once you know where to look:
- Select Your Object: Convert your 3D mesh to an Editable Poly (or apply an Edit Poly modifier).
- Enter Edge Mode: Press
2on your keyboard to switch to Edge sub-object selection mode. - Select the Target Edges: Double-click an edge to select an entire edge loop, or select individual edges you wish to re-position.
- Enable Edge Constraints: Open the Edit Geometry rollout panel on the command panel. Locate the Constraints drop-down menu (which is set to None by default) and change it to Edge.
- Move the Edges: Use the standard Move tool (
W). Now, when you drag your edges, they will slide perfectly along the existing polygon plane without altering the underlying curvature.
Pro Tip: Always remember to switch the Constraint option back to None once you finish sliding your edges; otherwise, your future transformations will remain restricted!
Elevate Your 3D Modeling Skills
Mastering essential tools like edge constraints saves time and ensures a professional finish for your assets. Whether you are an architectural visualizer, a game asset creator, or a 3D artist, following this quick 3ds Max tutorial will significantly improve your efficiency and keep your meshes clean. Try incorporating this workflow into your next project to eliminate unwanted mesh warping for good!


