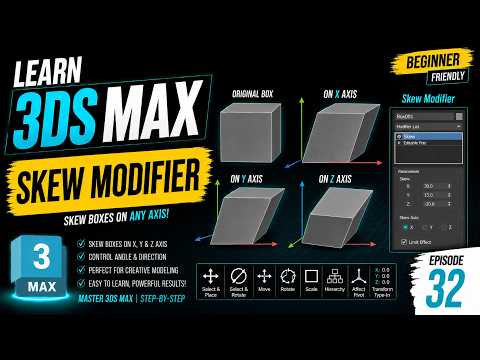
In the world of 3D modeling, precision is key, but sometimes you need to "bend" the rules to achieve the perfect look. Whether you are designing architectural structures or stylized characters, understanding how to deform geometry efficiently is a vital skill. One of the most versatile tools for this task is the Skew Modifier. In this guide, we will explore how to master this tool within 3ds Max to enhance your creative workflow.
What is the Skew Modifier?
The Skew Modifier allows you to tilt an object’s geometry uniformly along a specific axis. Unlike manual vertex editing, which can be time-consuming and prone to errors, the Skew Modifier provides a non-destructive way to apply a slant to your models. By adjusting a few simple parameters, you can transform a perfectly vertical pillar into a leaning structure or give a simple box a dynamic, aerodynamic shape.
How to Use the Skew Parameters
Once you apply the modifier from the command panel in 3ds Max, you will be presented with several key settings:
- Amount: This determines the intensity of the slant. A positive value tilts the object in one direction, while a negative value tilts it in the opposite direction.
- Direction: This setting rotates the skew effect around the vertical axis. It allows you to fine-tune exactly where the "lean" is pointing without having to rotate the object itself.
- Skew Axis: You can choose to apply the effect along the X, Y, or Z axis. Selecting the correct axis is crucial for ensuring the deformation aligns with your project’s orientation.
Precision Control with Limits and Gizmos
For those who need more than just a basic tilt, the Skew Modifier offers advanced controls. By expanding the modifier in the stack, you can access the "Gizmo" and "Center." Moving the center point changes the origin of the skew, allowing for more localized deformations.
Additionally, the "Limits" section is incredibly useful. By checking the "Limit Effect" box, you can define specific upper and lower boundaries. This ensures that only a certain portion of your model is skewed, while the rest remains unaffected—perfect for creating complex architectural joints or specific mechanical parts.
Conclusion
Mastering modifiers is what separates beginners from professional artists. By adding the Skew Modifier to your toolkit, you gain a fast and flexible way to manipulate shapes without ruining your underlying topology. Experiment with different axis settings and limit ranges to see how this powerful feature can transform your next project in 3ds Max.


