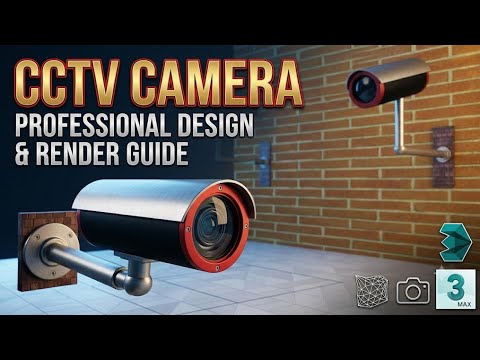
Creating photorealistic hard-surface objects is one of the most valuable skills in modern 3D visualization. Whether you are building assets for architectural visualization, video games, or commercial product design, mastering the workflow for mechanical equipment—like a modern CCTV security camera—can instantly elevate your portfolio. In this guide, we will break down the essential pipeline for modeling, detailing, and rendering a high-quality CCTV camera from start to finish.
Step 1: Blocking Out the Base Geometry
Every great 3D model begins with accurate primary shapes. Start by gathering reference images of real-world security cameras to establish correct proportions. Focus on constructing the main cylindrical casing, the top shield, and the swivel mount using standard primitives. Utilizing the robust polygon modeling toolset in 3ds Max, refine these initial shapes while maintaining clean edge flow and topology for smooth subdivision later in the process.
Step 2: Adding Hard-Surface Details
What separates an amateur model from a professional asset is the micro-detailing. Focus on functional elements such as mounting screws, cable pass-throughs, lens housing rings, and infrared LED arrays behind the glass cover. Adding subtle chamfers or bevels to sharp edges is essential—in reality, perfect 90-degree edges do not exist. These bevels catch highlights dynamically, giving your model realistic weight and depth.
Step 3: Texturing and Material Setup
Once geometry is complete, move on to realistic shader creation. A realistic CCTV unit incorporates various material types: matte plastic for the main shell, brushed metal for the bracket, and multi-layered glass for the camera lens. Apply procedural noise, roughness maps, and subtle surface imperfections like dust or scuffs. These details break up uniform specular highlights and prevent the render from looking artificially clean.
Step 4: Lighting and Final Rendering
With models and shaders ready, proper scene lighting will bring your asset to life. Position a standard three-point studio lighting setup or use an HDRI environment map to emphasize the physical contours and metallic accents of the camera. Fine-tune your camera depth of field, exposure, and render settings inside 3ds Max to capture photorealistic reflections, accurate refractions, and soft contact shadows.
By following this structured production workflow, you can transform simple geometric concepts into realistic, studio-grade 3D renders ready for any professional pipeline.


