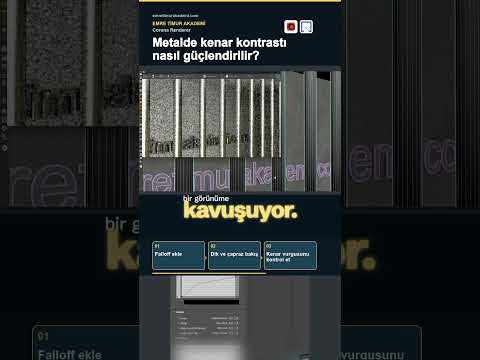
Creating photorealistic metals in 3D visualization often comes down to the subtle ways light interacts with surface contours. While basic reflectivity settings get you halfway there, mastering advanced techniques allows you to craft truly realistic 3ds Max materials that pop in your renders. In this guide, we will explore how to use the Falloff map in Corona Renderer to separate perpendicular and grazing angle colors, giving your metal edges the perfect contrast.
Understanding Viewing Angles in Metal Shading
In the real world, the appearance of metallic surfaces changes depending on the angle from which you view them. When looking directly at a metal surface (perpendicular angle), the color and reflectivity differ slightly from when you look across it at a sharp curve or edge (grazing angle).
When tweaking 3ds Max materials, standard shader settings might apply a uniform tone across the mesh, leading to flat-looking renders. By controlling viewing angles independently using a Corona Falloff map, you mimic natural light behavior and add dramatic, realistic edge highlights to your 3D objects.
Setting Up Corona Falloff for Sharp Edge Contrast
To separate viewing angle colors and accentuate metal edges, follow these straightforward steps:
- Create a Corona Material: Start by setting up a basic Corona Material tailored for metal (high reflectivity, low diffuse opacity).
- Plug in a Falloff Map: Connect a Falloff map into your material's reflection or color slot depending on the visual result you want to achieve.
- Adjust Perpendicular vs. Grazing Colors: Set the Perpendicular color (facing the camera) to your primary metal shade, and adjust the Grazing color (the edges) to a lighter or higher-contrast tone.
- Fine-Tune the Curve: Tweak the Falloff mix curve to strictly define how subtly or aggressively the edge highlight bleeds into the rest of the surface.
Comparing Edge Highlights on Sample Surfaces
Once applied to a curved or hard-surface sample model, the difference is immediate. The Falloff map creates a crisp, light-catching effect along bevels and silhouettes without requiring extra studio lights. Comparing a flat metal shader to this customized setup reveals how far subtle edge contrast goes toward making your 3ds Max materials appear authentic, tactile, and visually compelling.
Conclusion
Enhancing metal bevels with the Falloff map in Corona Renderer is a simple yet powerful workflow tweak. By separating facing and glancing colors, you bring depth, precision, and a high level of photorealism to every corner of your 3D assets.


